


GitHub is a development platform for version control and collaboration. It allows you to host and manage your projects and work together on same projects from anywhere.
Well let’s start with a few basics.
| Keyword | Description |
|---|---|
| Repository | “Repo” for shortv is a folder for storing your codes, files, text files, image files, etc. It can be local folder on your computer, or a storage space on GitHub. |
| Fork | A copy of someone else’s project or repository. Forking makes it possible for you to freely experiment the project WITHOUT affecting the original project. |
| Upstream | The original repo or Project that you have forked |
Repositories Branches Commits Pull Requests
It is basically a Version Control System which helps us to have a multiple versions of our project every point of time to avoid losing or overwriting it. If you are working together on the same projects then Git will help you to:
- Save your codes online.
- See what new changes are made by all developers
- Discuss issues with other developers
- Recovering deleted datas
- Revert accidentally changed data.
- Share and exchange code with other developers easily.
- Backup your code easily to a remote server.
- And Many more
Refer to this Link
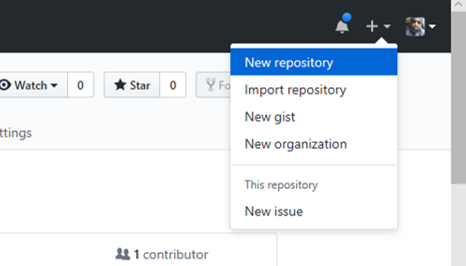
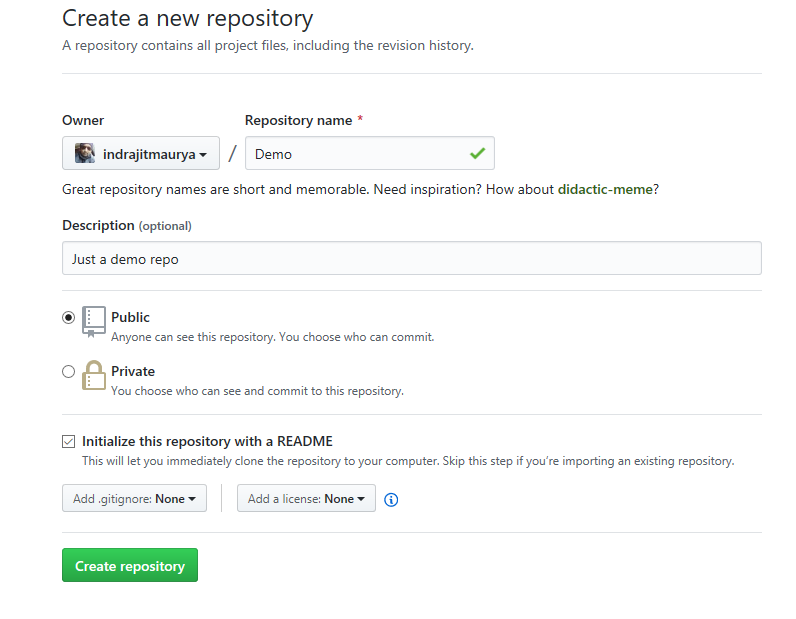
create a new branchSelect New Repository
|
|
|
Create a Repository
|
| |
|
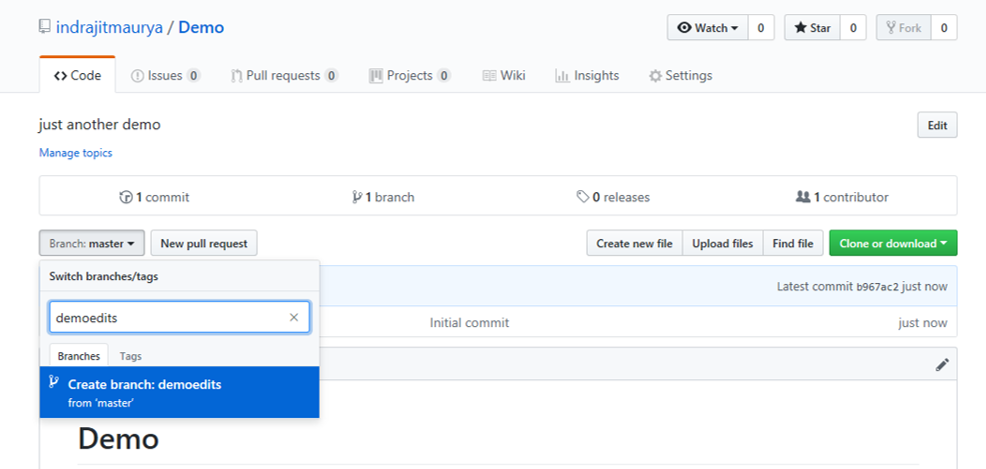
We use Branching to work on different versions of a repository at one time. The default BRANCH is named as MASTER. We create new branches which can be said as a copy of Master branch and we do our experiments there before committing them to master. Any changes done in your new branches will not be reflected in your master branch. But if someone made a change in your master branch then you could pull in those updates to your branch. When the code is ready, you can merge all of your branch into master. | ||
Create a New Brach
|
|
|
|
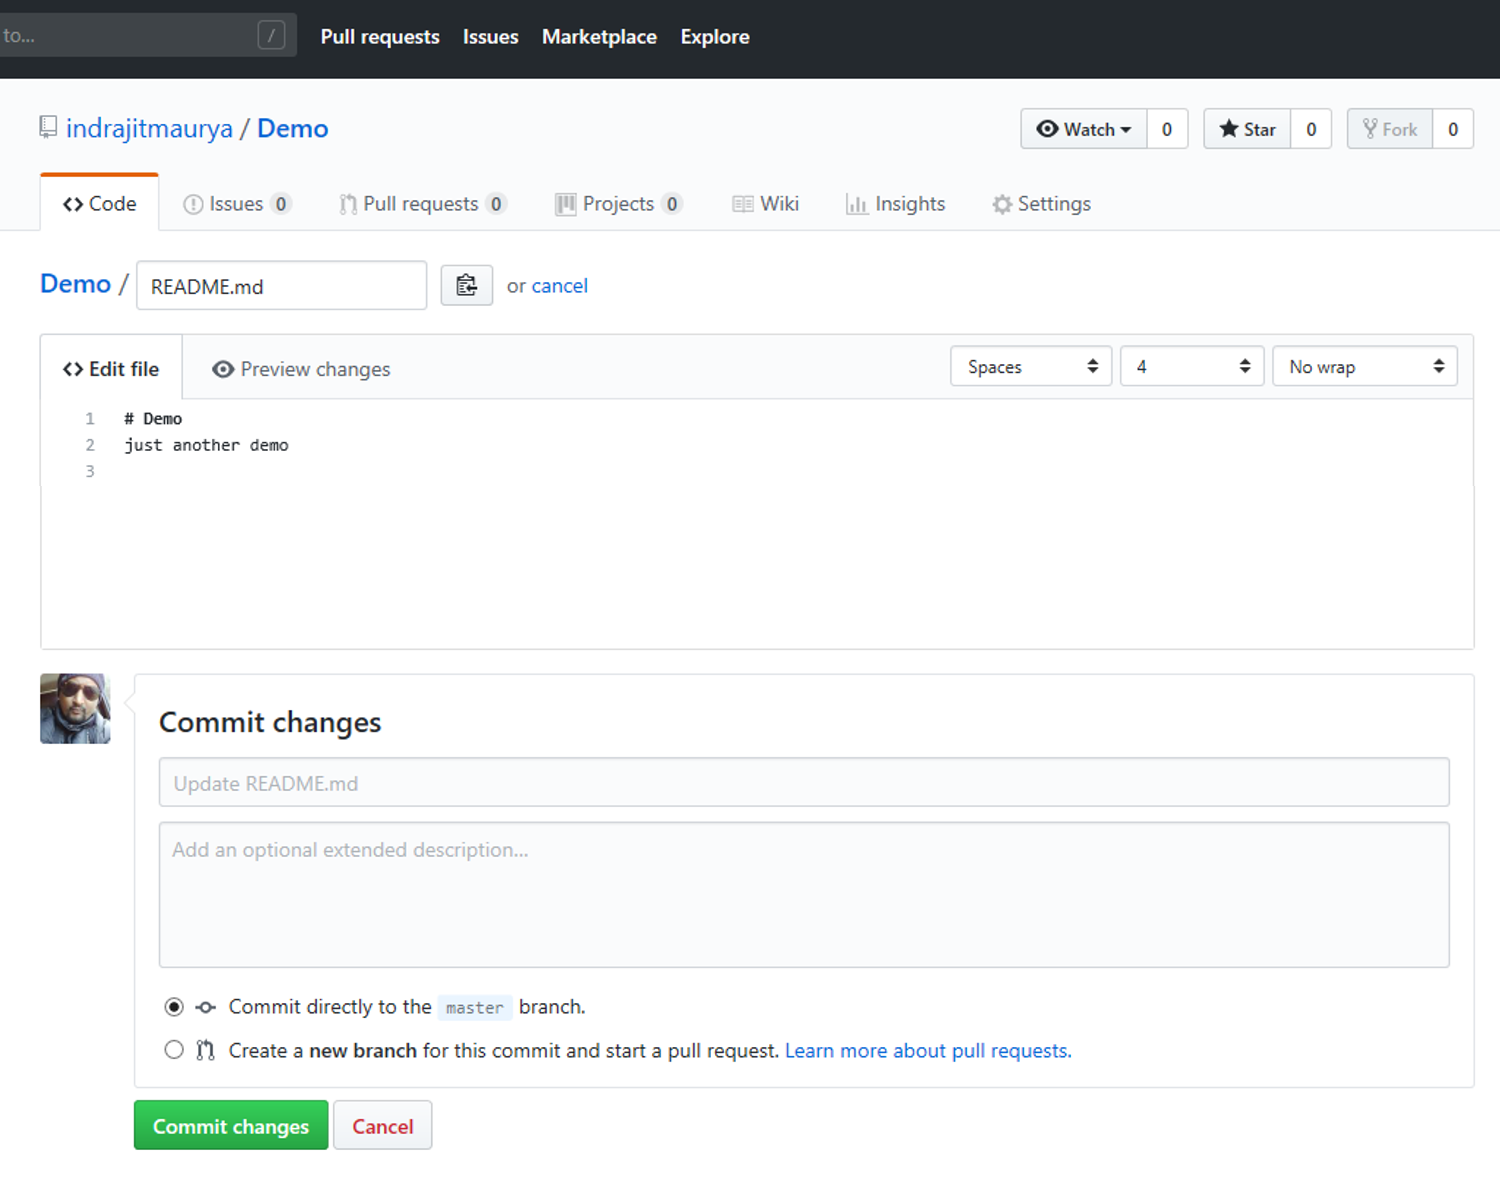
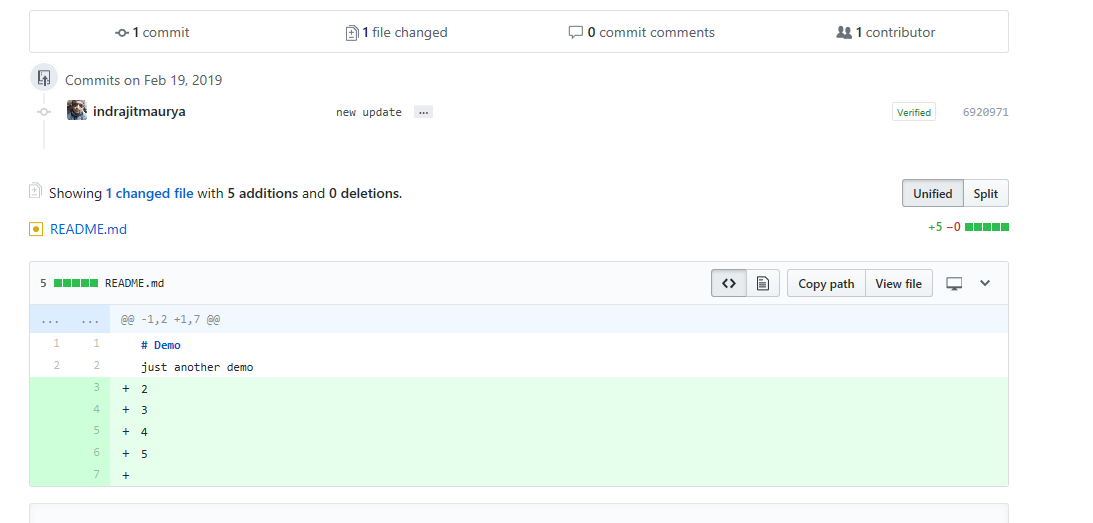
Commits are basically saving your changes. For each commit you can add a commit message and a small description explaining the changes made so that other contributors will understand why you made the change. In short Commits prepares a history of your changes. Thus helping you to see your previous codes. | ||
Create Commit
|
|
|
|
||
|
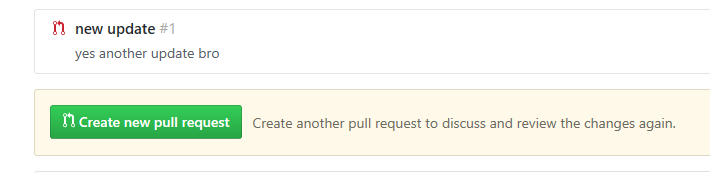
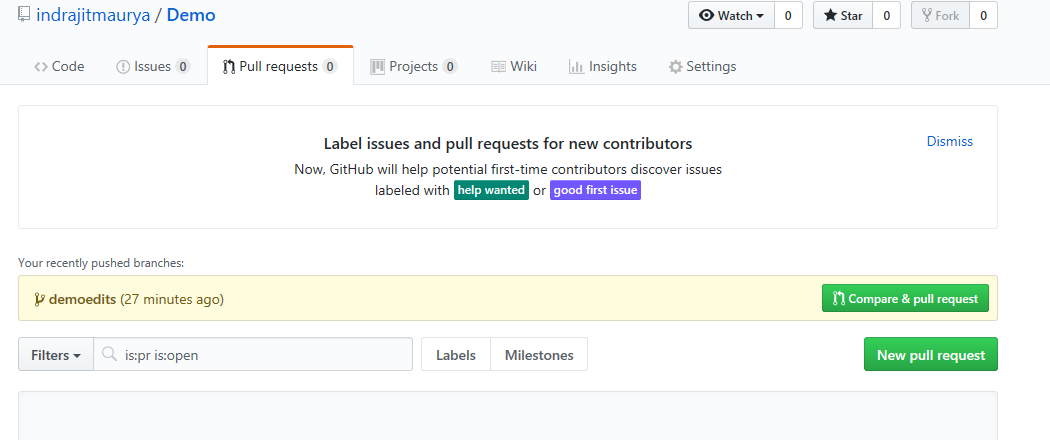
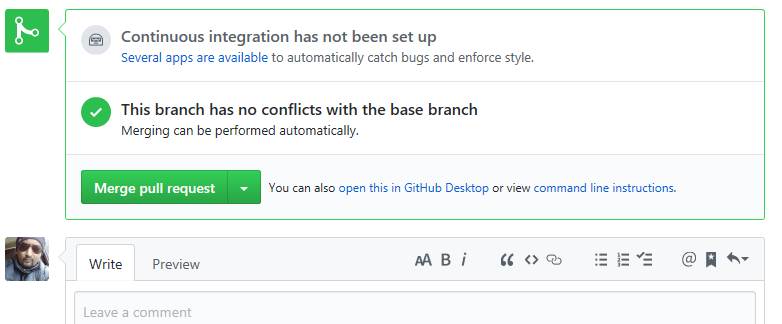
Now it’s time for pull request. You can open a pull request in your own repository and then merge it to your master branch. But mainly we use pull request to propose your changes to someone interested. If someone review your code they will pull in your contribution to their branches. You can easily figure out the differences of the content from both branches. | ||
Click the Pull Request tab Click New Pull Request |
|
|
In the Example Comparisons box, select your branch Compare with the Master Branch. |
|
|
click Create Pull Request button. |
|
|
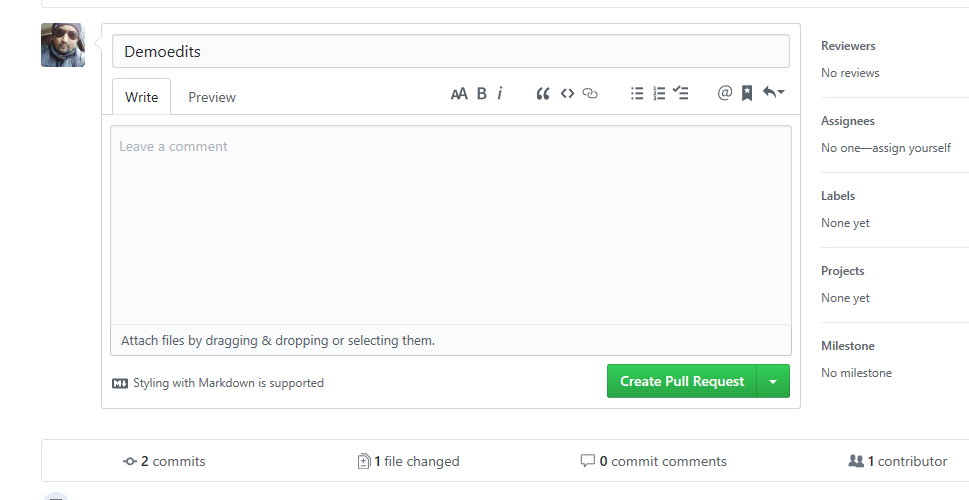
Give a title and a brief description of your changes. |
|
|
Click Merge pull request Click Confirm Merge |
|
|
Delete your Branch |
|
|


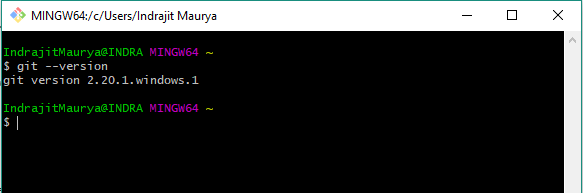
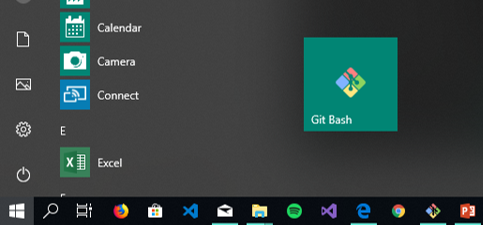
| Search for Git Bash |
|
| Type git –version |
|
Go to Desktop and create a folder “git”. Open the folder and right Click, select Git Bash Here |
|
Create a Respository Online. Follow instruction above |
|
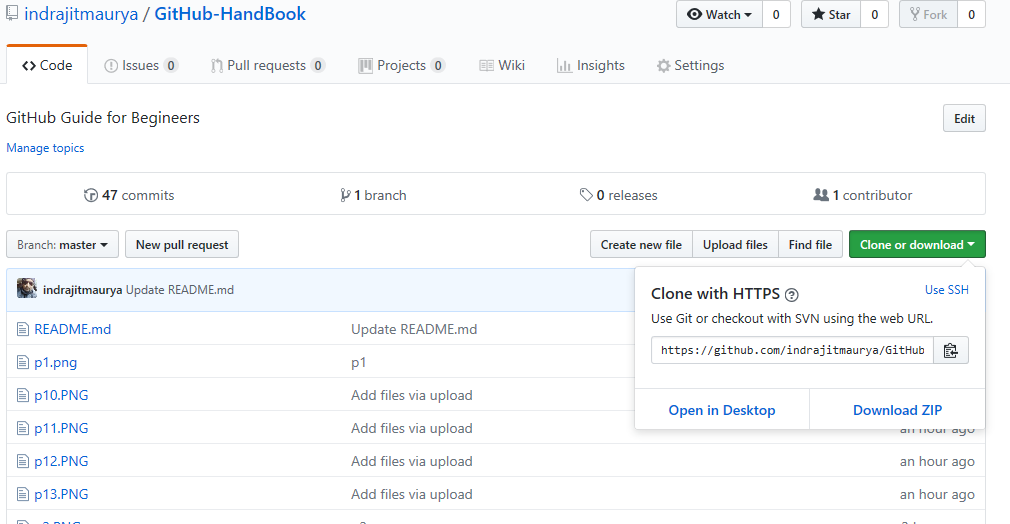
| Click Clone or Download Copy the URL |
|
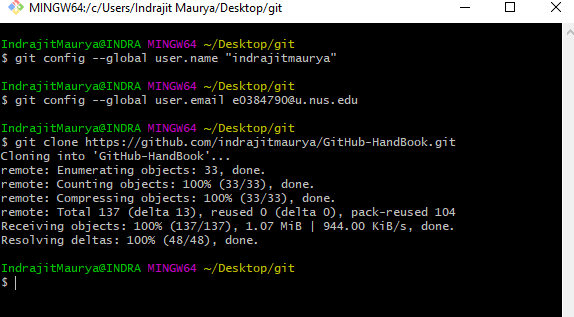
| git config –global user.name “Your Name” git config –global user.email “youremail@domain.com” git clone (Paste the URL) |
|
Go to the “git” folder and there you go. All files in your local folder | |
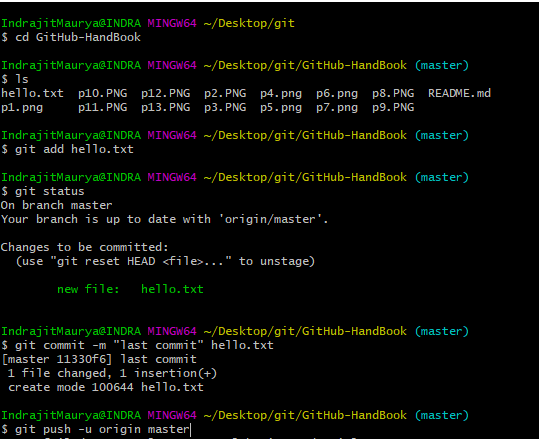
| Go inside the new folder. In my case its “GitHub-HandBook” and create a file “hello.txt” | |
| type cd “folder name” git add hello.txt git status git commit -m “(committed message)” “filename” git push -u origin master Provide your credentials There you go, Refresh your GitHub Online Account to see the new file |
|


 https://github.com/bhokloo/GitHub-HandBook